I recently purchased an inexpensive LED light strip off Amazon. I picked up a battery-powered kit with an integrated motion sensor (click here for my review of the product itself). My plan was to line the inside of the door frame on my new linen closet with the light strip. This way, I could have a cool lighting solution that would turn on when you open the linen closet door. Plus, I wouldn’t have to run new wire through my walls. I wanted to extend the light strip in the center so that I would have enough lighting on each side of the door frame to illuminate all of the shelves within my closet. Follow along with me below and I’ll show you how to extend LED strip lights by cutting the strip and soldering in some wire.
Lay Out Your Light Strip Temporarily To See How It Will Look
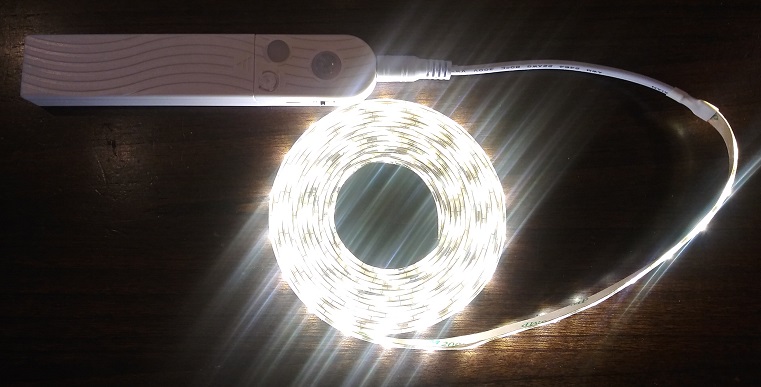
I was pretty excited when the package arrived with my LED light strip and controller. Of course, the first thing I did was put batteries in it and play around a bit. I temped the kit in around the inside of the door frame in my new linen closet. By “temped in”, I mean that I temporarily hung the strip so that I could see how it would look. I used Scotch tape to hold the LED strip in position so I could see what it would look like.
With the strip’s controller on one side of the closet, I ran the light strip up the door frame. From there, I brought the strip, around the top of the door, and then down the other side. With everything laid out as it was, the strip was just a little too short to illuminate the lowest shelf.
Plan Your Modification
I decided at this point to extend the light strip to get the light where I wanted it. I wanted to modify the light strip by cutting it in half. My plan was to splice in enough wire to cross the top of the door frame. This way, I would take the excess light coverage away from the top shelf and ensure that all shelves were illuminated more or less equally.
If necessary, take the time to temp in your light strip to see how it fits. You can always hang it up with some Scotch tape and move it around if you don’t like where you’ve placed it. Once you peel off that backing paper, though, there’s no turning back. Try to get it right on the first shot by giving it a dry run. That way, you’ll see what you’ll have to do to end up with a job that looks the way you want it to look.
What I’m driving at is that the first step in the project is to determine where you will need to cut your LED light strip. Additionally, you’ll need to know how much wire you will want to solder in at each cut.
When you’re estimating how much wire you need, err on the side of cutting too much wire. You can always wrap up any extra and tuck it out of sight. It’s a lot harder to make 29″ of wire bridge a 30″ gap if you cut it too short.
Cut Your LED Strip Lights
The strip I was working with permitted a cut after every single LED section. Many LED strip lights can only be cut every third section or so. Chances are, an extra inch or half inch won’t make a tremendous difference in the final appearance of your lighting.
One way or the other, it’s typically very obvious where you should cut. You will most likely see a solid line in the middle of the copper pads at which you will make new electrical connections. Take care when cutting LED light strips – make your cuts only at the designated points. If you cut somewhere other than the marked positions, you will likely disable some of the LED’s on the strip.
Making the cut is extremely straightforward. Simply cut the strip at the designated line with a pair of scissors.
Solder In Wire To Extend The LED Light Strip
It bears mentioning that I did first try to secure my wire to the copper pads without soldering. With the strip I was using, I found that the copper pads were too fragile. Poking the wire through the pads caused them to tear. With the pads torn, I was unable to form a reliable electrical connection.
Remove The Clear Coating Above The Copper Pads
A good solder job will allow you to form a robust electrical connection between the strip and your wire. When soldering LED strip lights, the first step is to remove the clear coating on top of the copper pads. I took a small paring knife and made a cut just inboard of the copper pads (close to the “-” and “+” symbols).
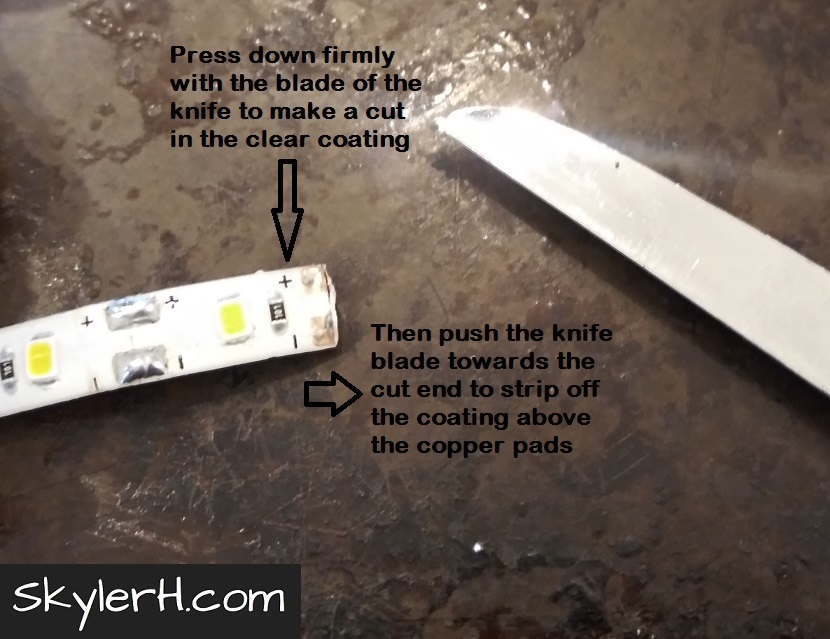
I found that as I pressed down with the knife, firm pressure got me through the clear coating without cutting into the white backing. In that regard, the strip I used was pretty easy to cut without damaging. Once I had pushed down and cut the coating, I pressed the knife blade towards the cut end of the strip. This peeled up the 1/8″ or so of clear coating above the copper pads.
Get Ready To Solder Your Wire
Go ahead and gather your materials for soldering. Of course, you’ll need whatever wire you’ll be using to extend your LED light strip. I had some extra garage door safety sensor wire laying around. For the task of soldering LED strips, I thought this particular wire was perfect. It’s small gauge wire, but has a solid, rigid single conductor instead of stranded wire. This made it very easy to solder the wire to the small copper pads I’d just exposed on the cut ends of the LED light strips.
Because I’d temped in my LED strip light, I knew pretty precisely how long my wire needed to be. I used wire strippers to cut my wire to the desired length and then strip off a small amount of insulation from each end. I used a pair of scissors to cut between the two insulated wires on each end to separate them. Then, I stripped about 3/8″ of insulation or so, but that was mainly out of habit. In reality, you only need to strip a slightly larger length of wire than the width of your copper pad. Probably around 3/16″, maybe 1/4″.
Everyone Needs A Helping Hand
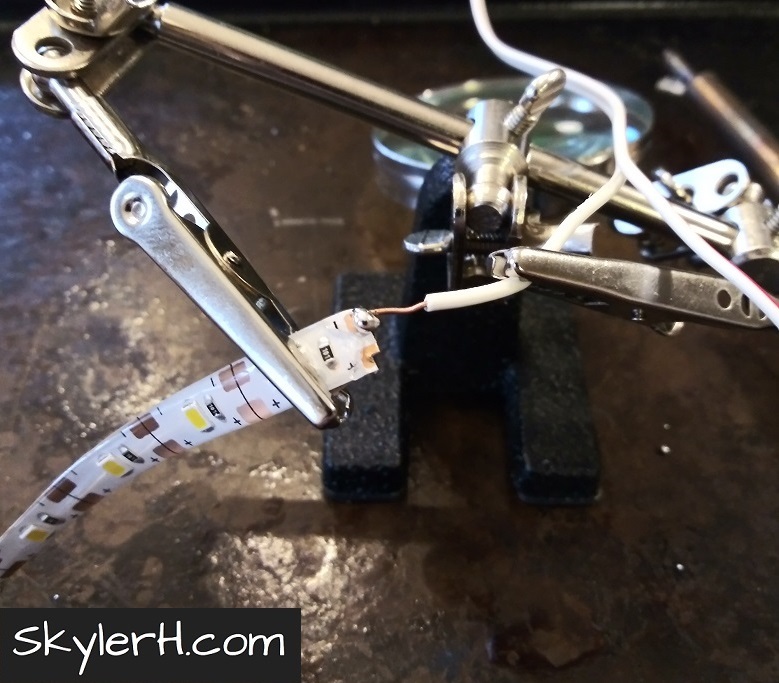
I also like to use a 3rd hand tool. Depending on the situation, I’m not really sure how you would solder without one. After all, you have to hold the part, the wire, the solder, and the soldering iron – all at the same time. So, for a few bucks, a 3rd hand tool can be a big help for soldering LED light strips.

Once you have all of your tools and materials ready, go ahead and heat up your soldering iron. I just used an inexpensive soldering iron that doesn’t have its own base, so I used an old metal pan to protect the table where I was working.
Solder The First Wire To The LED Light Strip
Now, it’s time to make the electrical connections. Using the third hand tool, I positioned the stripped end of the wire on top of the LED strip’s exposed copper pad. The wire I was using had white insulation with a red stripe on one of the two wires. I wanted to connect the wire with the red stripe to the “+” terminal. So, I positioned the wire without the red stripe on the copper pad labeled “-” and got started. I started with that wire because it was on the “back end” of the strip as I had it positioned. By working on the “far” wire first, it wouldn’t be in my way when I go to work on the second wire.
With the first wire in place on the copper pad, add solder to the copper pad. Make sure your joint is strong, both mechanically and electrically. Also make sure that you do not add so much solder that it electrically connects one copper pad to the other.
Test Your Electrical Connection
After each solder joint, I like to test the connection electrically. If I messed up on the joint, I want to fix it now while everything is in position. I don’t want to solder the other wire on and then have it in my way when I realize that I have to fix my first connection.
To test the connection, I got out my multi-meter. With batteries in my LED light strip’s control module, I make sure the lights on the strip turn on. Voltage should be present at the + and – copper pads at the cut end of my terminal strip. For a “sanity check”, I first measure DC voltage at the copper pads to make sure my multi-meter is working. Then, I touch one multi-meter lead to the opposite end of the wire that I just soldered on, and the other multi-meter lead to the copper pad that I haven’t yet soldered. I should see approximately the same DC voltage reading on the multi-meter as when I measured the two pads directly.
How’d I Do?
If I see voltage between the pads, but not between the unsoldered pad and the opposite end of the wire I soldered on, or if I see a significantly reduced voltage, then my solder joint is no good and I need to try again. Hopefully you can just melt the solder and try to get a better joint. If you’ve damaged the copper pad beyond use, you can always cut back one more section and try again. When soldering LED lights, you want to make sure that you have a solid joint that will hold up over time.
If I have good voltage, then I’m good. I can go ahead and solder the other wire onto the other copper terminal at the cut end of the LED light strip.

Once you’ve made the second joint, check both electrical connections. With the LED light strip on, test for good DC voltage between the two wires on the opposite end of your wire extension.
Protect Your Solder Joints
Now that you’ve soldered both wires to the copper pads and tested your work, you need to protect the new connections. I stripped back way too much insulation from my wiring, but even with less exposed wire, I still would need to take this step as I’ll describe below.
First, wrap one of the two wires with electrical tape. Make sure to cover any exposed wiring. You don’t want the two wires to be able to contact each other down the road and cause a short. Wrapping one wire with electrical tape will help to ensure that it cannot short with the other wire.

With one wire wrapped, get some more electrical tape and wrap up both wires. Start your wrap on the LED light strip and wrap several times around both wires. You want to make sure the copper pads, solder joints, and exposed wires are completely covered. You also want to create a bit of “strain relief”. If something tugs on your wire, you want some of the tension to be absorbed by the electrical tape, instead of by your solder joint.

Extend Your LED Light Strip By Connecting The Other End Of The Wire To The Next LED Section
Now it’s time to finish extending your LED strip lights by performing the same work on the other side of the wire. By connecting the next section of LED lights to the wire, you’re creating the custom fit to suit your application.
Follow all of the procedures above on the other side of the wire. Earlier, I made sure to use the red striped wire on the positive terminal. The purpose of this was to make it easy to now identify which wire will go to which terminal on the next LED section. If I used the red wire to identify positive coming out of the first section of the light strip, I need to use the red wire to supply the positive terminal going into the next section of the light strip.
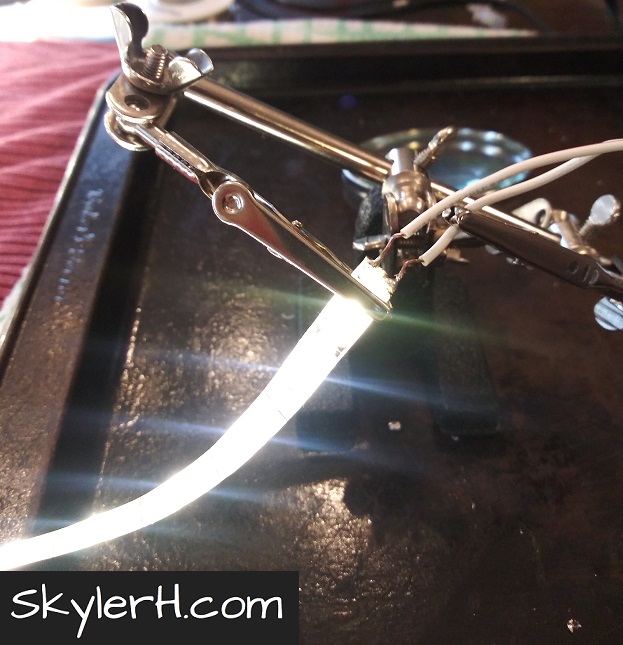
Once you have both wires on this side soldered up, you can test your electrical connections by simply turning on the LED strip lights and seeing if both sides turn on.
If everything looks good, make sure to protect the new connections as you did with the first section. Repeat this whole process if you need to add any additional sections of wire beyond the first.

Install Your Extended LED Strip Light
That’s it! Now it’s time to bring your device back to its intended area and see how you did on the wire length. Hopefully you have enough or more than enough wire (versus being a little short).
I took my modified light strip to my new linen closet and temped it back in place with Scotch tape. I wanted make sure that it looked the way I wanted and that my battery-powered LED light strip controller with motion sensor would reach to the front of the shelf where I planned to mount it.
Make It So
Once I had the extended LED strip light in place and was satisfied with how it was positioned, I began by mounting the battery-powered light controlled to the front of the shelf. I chose to position mine in that location so that the motion sensor would reliably detect someone opening the door or walking past the closet if the door is open. After using the 3M adhesive tape to mount the controller, I positioned the start of the LED light strip on the inside of the door frame. When doing so, I made sure that I left just a bit of slack in the controller’s output cable. You generally don’t want cables pulled taut.
I started peeling off the backing paper so I could permanently adhere the light strip to the inside of my door frame. I peeled off about 6 inches or so of backing at a time. With the backing paper pulled aside, I gently pulled the LED light strip straight and then pressed down with my other hand to adhere the adhesive.
Marvel At Your Finished LED Light Strip Modification
Once you have the light strip completely adhered, it’s time to test it out! I connected the cable to my controller and opened and closed the door a few times. The kit I bought also had a time-out on the light. After the motion sensor stops seeing motion, it turns the light off after a short interval. The interval is adjustable with a rotary dial on the front of the controller.
All-in-all, I was very happy with how my kit looks and performs, especially at its very affordable price. Have you done a similar modification to your own LED light strip? Leave a comment and tell me about it!
Thanks For Reading!
I hope this guide was helpful for you. If you have any questions or want to share any notes from your own project, please feel free to leave a comment. If you’d be interested in seeing more content like this, enter your email below so I can let you know whenever I make a new post:
Thanks again for reading, and best of luck in your own LED lighting projects! 🙂